Monday, November 01, 2010

Ricoh Japan - New GXR Firmware v1.29 - Fast AF WOW!

Ricoh Ginza HQ Chat Area

Ricoh Japan just released the new GXR firmware, version 1.29, on their Japan site, and the autofocus speed is now really, really fast. Everyone who has a Ricoh GXR with A12 50mm module should definitely update right away. Fantastic improvement and thanks Ricoh!

How to Upgrade Ricoh GXR Firmware

  1. Download the firmware and unzip it.
  2. Put the firmware files (several files) onto an SD card and put the card into the camera.
  3. Make sure the camera is off.
  4. Press plus and playback buttons simultaneously for a few seconds until you see the LCD change.
  5. Follow the prompts, OK-ing to install.
  6. Don't mess with the camera while it is updating.

That's it.

Tuesday, September 28, 2010

Switching Parts of a String in Excel

I had the need to fix mistakenly entered email addresses in Excel, and luckily the mistake was a recognizable pattern. They should have been firstname.lastname@domain.com but were entered as lastname.firstname@domain.com. This short post explains how I extracted the names and switched them.

How to Swap Parts of an Excel String

First assume you have smith.joe@acme.com in cell A2, and that what you want is joe.smith@acme.com in cell A5. Enter this formula in cell A3:

=LEFT(A2,(FIND(".",A2,1)-1))

That extracts "smith" out of the email address in A2, by using the FIND function to return the number of the position of the period. You subtract 1 to tell LEFT when to stop extracting.

Next, in cell A4, enter this formula:

=MID(A2,(FIND(".",A2,1)+1),((FIND("@",A2,1))-(FIND(".",A2,1)+1)))

That uses MID to extract from one after the period, through one behind the @. This is about finding the positions of parts of the string you can see are in a pattern, and subtracting or adding 1.

Now in A5 you can concatenate the two in the proper order, and add the domain, thusly:

=A4&"."&A3&"@acme.com"

That's it & good luck!

Sunday, September 05, 2010

Mama-chari Schrader Valve "Mushi Gomu" Repair

Shinko "Mushi Gomu" Valve RubberIf you live in Japan or have visited, you will know the ubiquitous "mama chari" (mom bike) from its loud squeaky brakes, and precarious perching of bags and children both, on its front and rear platforms and baskets. My wife's mama-chari rear tire got a flat, and as the resident mechanic around the house, I got to fix it. I tried pumping it up, but that was not working, and noticed that to get the rear wheel off if I had to remove the tube, I would have to disassemble the rear friction brake (the source of all that squealing!).

Yikes, lots of parts. I decided to google removing the rear wheel on a mama-chari, and found an article talking about that topic, but warning readers to make sure the "mushi gomu" was intact, saying this is a common cause for what people think are flats. This mysterious "bug rubber" (虫ゴム) is just a little rubber tube about 1.5 mm diameter and 2 cm long, that you slide over the valve plug. It forms a seal between the metal valve plug and the side of the valve, letting air in during the pumping, but keeping it from flowing out otherwise. But, it makes like a flat if it is oxidized.

If you remove the valve cap, and unscrew / pull out the valve plug from the valve case sticking out of the hole in the rim, you can check whether the rubber is rotted or otherwise broken. Sure enough, when I took a look at ours, it was all rotted and falling off. So I went to my LBS (Local Bike Shop) and asked for "mushi gomu". JPY 150 and we were all fixed in 5 minutes.

Hope this helps other cycling DIYers in Japan.

Tuesday, June 22, 2010

Convert Line Endings with Aplomb

When transferring files from system to system, for instance, using csv files to transfer data from one db to another, sometimes there are problems where programs will not process a file because of its line endings. This happens especially if you process a file on one platform, say Mac, and try to use the file on another, say Windows. Even if you have saved a file as CSV from Mac Excel 2008, it will not necessarily be saved in a format that can be read programmatically, if the program is expecting a certain type of line ending.

How Can We Avoid Line Terminator Problems and Troubles?

Let's recall how lines are terminated by default on Windows, Mac and Unix.

  • Windows-style line endings are CRLF ( \r\n or hex 0D0A )
  • Mac-style line endings are CR ( \r or hex 0D )
  • Unix-style line endings are LF ( \n or hex 0A )

There are a number of ready-made command line programs like unix2dos, dos2unix, mac2dos, dos2mac and so on, that can be used to convert line endings. Note that you can also use the tr or perl commands as well. Tr is available on Macs by default and on almost any unix. Perl is pretty ubiquitous as well. E.g:

[root@server /path/to/files]# tr '\r' '\r\n' win-crlf-file.csv

[root@server /path/to/files]# tr '\n' '\r\n' win-crlf-file.csv

[root@server /path/to/files]# perl -pe 's/\r\n|\n|\r/\r\n/g' unix-lf-file.csv > win-crlf-file.csv

If you want to find out whether a file has the expected line terminators, you can use the file command on *nix or Mac. Here's what that looks like:

[root@server /path/to/files]# file inputfile1.csv

inputfile1.csv: ASCII text, with CRLF line terminators

[root@server /path/to/files]# file inputfile2.csv

inputfile2.csv: ASCII text, with CR line terminators

You can also use the cat command to show line endings, with its -e switch. Do a man cat for more info, because you can also get line numbers, for instance. The first file below has CRLF, which shows up in cat’s output as ^M$, and the second file has only a ^, which is equivalent to the Mac CR line ending only situation. What you need will depend upon the import program.

[root@server /path/to/files]# cat -e inputfile1.csv

Part,Cust,Price,StartDate,EndDate,Reason^M$

123-ABC-456,CUST000001,100,6-01-2010,05-31-2011,Regular Update^M$

456-ABC-789,CUST000001,100,6-01-2010,05-31-2011,Regular Update^M$

[root@server /path/to/files]# cat -e inputfile2.csv

Part,Cust,Price,StartDate,EndDate,Reason^123-ABC-456,CUST000001,100,01-06-2010,31-05-2011,Regular Update^

Besides line endings, there is also the text encoding of the file, to watch out for. For instance, is the file saved in Roman or Unicode or some other format? In the end, take care to confirm the file you have output is what is needed by the program for input. Enjoy!

Tuesday, June 01, 2010

Fixing a Mac OS X Spotlight Index, that Doesn't

Mail.app "Entire Message" Greyed OutAfter a spate of Mail.app problems probably related to having too damn many mail accounts and messages, I had to do the "Mail.app Reimport Samba" taking hours to let Mail.app reimport the entire mail store. After that got resolved, I found out that my Mail.app "Entire Message" selection in Search was greyed out. This turned out to be a symptom of a problem with the Spotlight index, since this search function of Mail.app is dependent upon the Spotlight index of the hard drive where your mail is stored. Generally speaking, the Solution was to delete the Spotlight index, and then re-index the drive. However, it was not a simple process (is anything?!), and as such was very "un-Apple", so I thought I would take the time to document it.

How to Make Spotlight Re-index Your Drive, Even When She Says No!

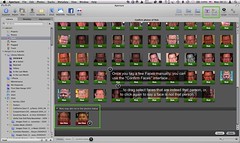
A.k.a., How to Fix Greyed Out "Entire Message" in Mail.app Search. As I was learning to do this procedure in my OS X 10.6.3 system, looking at the Apple forums and elsewhere, I observed that Spotlight was taking "forever" to re-index, while it should re-index a 500GB drive in an hour or so. When I clicked the "pulsating" Spotlight icon in the upper right of the screen (it pulsates or winks while re-indexing), I saw a message that Spotlight was calculating the time required to index the drive with a barber pole progress bar, but it was just stuck in this state for days. This prompted me to try various things to fix it, and no one method from any one forum ever worked for me, in practice.

So, let me try to explain what did work.

Remove the Extraneous

Disconnect any external drives and shut down any unneeded programs.

Remove Unneeded Spotlight Importers

Spotlight importers which allow programs to get their output files indexed are sometimes the cause of Spotlight crashes. You can find them in /Library/Spotlight and ~/Library/Spotlight (where ~ is your home directory, of course). If you have third-party importers, especially in ~/Library/Spotlight, you can move them to another folder for safekeeping, then move them back one by one to see if the "indexing forever" problem recurs. I deleted ones that were associated with programs I never use, but kept the ones I do use.

You can search the entire drive for the .mdimporter files, using this command. Hat tip to "Hal Itosis" (lol) on the MacFixit Forum.

# find -x / -iname \*.mdimporter -exec ls -lndotT {} +

Repair Disk Permissions

I use the excellent Cocktail for this but you can do it in 3rd Party OnyX or Apple's included Disk Utility as well. In Cocktail, use the Disks menu, Permissions tab. Choose to Reset Permissions and ACLs for Home Directories for All Users, then click Repair. This takes about 30 mins to execute.

Prepare the Index

Using Terminal, use launchctl to unload the indexer by controlling the appropriate launchd command, use mdutil to turn off indexing for the root folder (the /) of the local hard drive, use rm to delete the index itself (.Spotlight-V100 in the root of the drive), and finally trash Spotlight's plist.

$ sudo bash

Password: *******

# launchctl unload -w /System/Library/LaunchDaemons/com.apple.metadata.mds.plist

# mdutil -i off -E /

# cd /

# rm -rf .Spotlight-V100

# rm -rf ~/Library/Preferences/com.apple.spotlight.plist

# exit

$

To explain, note the sudo bash and exit lines, bookending the procedure. This gets you a root prompt (the #) after you enter the admin password and then exits the root prompt at the end (returning to the $ prompt). You can also use sudo before every command, to be extra safe.

Clear All Caches

Noting that this part will force a reboot, again in Cocktail Files, Caches, choose Options and select all caches you can. Executing this resets the system to a state close to what you get when you install anew or do a major upgrade. Note that the system will take longer to restart because it is rebuilding caches, and applications will be sluggish the first time they restart, because they are rebuilding font caches.

Click Clear to execute the cleaning procedure and wait while it finishes. Choose to let the system restart, but when you hear the startup chime, hold down Shift so the system restarts in Safe Mode.

Safe Mode Index Rebuild

The system will take a while to get into Safe Mode. After you press and hold Shift while starting up, once you see the progress bar during startup (which is not present in normal mode), you can let go of Shift and go get coffee while it starts up. The login prompt will have a red Safe Mode in it, to alert you to the difference.

Again in Terminal, issue some commands to rebuild.

$ sudo bash

Password: *******

# launchctl load -w /System/Library/LaunchDaemons/com.apple.metadata.mds.plist

# mdutil -i on -E /

/:

Indexing enabled.

# exit

$

After a few minutes you should see the Spotlight icon start to pulsate, but this time, the "Calculating Indexing Time" should change to some value, and a blue progress bar, which means the indexing is actually working. You can restart into regular mode, and the indexing just picked up where it left off, for me. However, do not connect any additional drives until it is done indexing the main drive.

Observing and Confirming

There are a few things you can do to observe and confirm Spotlight's activities, in Terminal. This assumes you are at a root prompt.

Check the size of the Spotlight index using du (directory usage):

# du -hsc /.Spot*

1.1G /.Spotlight-V100

1.1G total

Note that this should be a fairly large file. If it is only a megabyte or so, something is broken or your Spotlight index is off.

Check Spotlight-related processes with ps (process lister):

# ps axcru |sed '1p;/ md/!d'

USER PID %CPU %MEM VSZ RSS TT STAT STARTED TIME COMMAND

root 352 0.0 2.8 3696728 117196 ?? Ss 8:44AM 24:25.73 mds

_spotlight 6677 0.0 0.2 2532748 10292 ?? SNs 3:19AM 0:00.33 mdworker

rcogley 6664 0.0 1.2 2638620 48240 ?? SNs 3:19AM 0:02.95 mdworker

Check index status with mdutil.

# mdutil -as

/:

Indexing enabled.

/Volumes/COGLEY-WD:

Indexing enabled.

/Volumes/COGLEY-WD/Backups.backupdb:

Indexing enabled.

/Volumes/COGLEY-WD2:

Indexing enabled.

/Volumes/COGLEY:

Indexing enabled.

List open files in /System/Library related to Spotlight, using lsof (list open files).

# lsof -c md |grep -v /System/Library |grep -v Spotlight

Get general system information with df and diskutil:

# df -lh

# diskutil info /

Show commands you have entered in the bash shell:

# history

Note that if you use an alternative shell like fish, some of the above commands will not work. From fish, just do sudo bash to get a bash-based root prompt. Be sure also to check the Console GUI application in /Applications/Utilities. This will show crash information for the mdworker program, which may give you hints to what is going on.

I hope this article helps someone, especially since this problem seems to be pretty prevalent, these days. Enjoy!

Friday, May 21, 2010

Apology accepted, Zendesk. Thank you.

Zendesk CEO Sorry TweetIn the wake of the Zendesk Price Fiasco of 19 May 2010, in which SaaS helpdesk vendor Zendesk announced pricing hikes which negatively affected most of their users (and would have caused a doubling for us), and after which an angry firestorm erupted, Zendesk users received an email apology from CEO Mikkel Svane today, and more information in his blog post.

I have a bit of a bitter taste in my mouth after having been treated that way, but let's let bygones be bygones. I very much appreciate the real grandfathering they have extended to existing customers.

So, apology accepted, Zendesk, and kudos to you Mikkel for doing the right thing. I am sure it was difficult.

Thursday, May 20, 2010

SaaS Helpdesk Software that Supports Japanese

After the Zendesk Price Fiasco of 19 May 2010, where Zendesk are proposing to significantly raise prices for their SaaS helpdesk solution, I am confident many users are looking elsewhere. This is one of the pitfalls of a SaaS solution, wherein the provider achieves external investment, and subsequently bows to pressure from said investors to raise prices or otherwise change a model that was working. At least for we users.

In our case, the cost of Zendesk, while was higher than others, was justified because it somewhat supported the Japanese mails my firm gets. I say somewhat because certain mails would cause Zendesk to have a fit, but that is mostly calmed down now.

That being said, now that Zendesk has basically doubled their prices for us and while I have made no decisions on whether to accept their "offer" of prepaying annually to lock in the current pricing for one year, I thought I would list alternatives and whether they support Japanese.

It is important to note, that there are several aspects to "supporting Japanese" some of which include:

  • User Interface
  • Ability to Email in and out of the Helpdesk
  • Ability to search
  • Ability to store Japanese data

Many web based products, and not just Helpdesk products, face these challenges when localizing to multi-byte character sets. User Interface is straightforward, as is the ability to store the data. These are kind of "level 1" localizations. Searching is harder, because of the space-less nature of Japanese, and emailing in and out is a major pain. Often, they get the email body correct, and you can see Japanese in it, but, the subject line is munged. It is a complex undertaking, especially for non-native speakers. So, caveat emptor.

List of Helpdesk Software that Supports Japanese

Confirmed Positive:

Zendesk themselves. Most Japanese mail is processed correctly but there are some glitches occasionally. We have personally confirmed all the above-mentioned aspects of Zendesk.

Kayako's Savin Behal replied to me in an email: Our software supports multiple languages. You may download the required (Japanese) language packs from the Kayako Forums at “http://forums.kayako.com/f50/”. These language packs have been shared by our clients. However, we regret to inform you that we do not support these packs officially.

Active Campaign supports Japanese fully, according to Jason in the comments on this post.

Web Helpdesk says they do indeed support Japanese email. From Shiraz Hemani, Business Development Manager: "Per your questions on email, yes Web Help Desk fully supports monitoring of any number of incoming mail accounts in all language character sets, including Japanese. Each incoming account can be associated with any number of outgoing mail accounts as well. We have more info available for that feature at:

http://www.webhelpdesk.com/trouble-ticket-software/convert-email-to-ticket.html"

Atlassian Jira does support Japanese. We had been using it in Japan, but moved away from it due to the glacial pace of development of certain security-related enterprise features we needed.

Confirmed Negative:

Tender says they do not support Japanese. Will says: "... I'm sorry, but we don't currently have international language support in Tender. We do hope to add the feature in the near future, but it's not ready at this time."

Unconfirmed:

http://www.cerberusweb.com/

http://www.thevisionworld.com/

http://www.autotask.com/software/service_desk.htm

Please comment if you have more or better information.

Updates

21 May 2010 - Zendesk has since recanted, apologized, and offered real grandfathered terms for existing customers. I have to say I have a bitter taste in my mouth, but, I would be remiss if I did not acknowledge the difficulty of changing systems. We'll sit a spell.

Wednesday, May 19, 2010

How not to run a SaaS: Zendesk

Zendesk CEO Noise CommentI got an email from Zendesk in the middle of the night and this blog post, breathlessly announcing "new features!" and along with that, new pricing. I and many other users could probably have dealt with an x% increase, but a doubling? It was even worse for people on other plans, as well, and that means a lot of upset users. CEO Mikkel Svane's patronizing attitude is not helping matters either (see the screen shot of his arrogant tweet in this post).

Down to brass tacks: we have 8 agents on the Plus+ plan and are paying the equivalent of 27 USD / agent per month. The new announced pricing puts it at 59 USD / agent per month. Users are being given an "opportunity" to lock their existing pricing in, by paying annually for a 15% discount, and it appears that the limit to this is one year. So, we take the hit up front by paying up front, and we take another hit later anyway. Sounds like a plan, Zendesk.

This is a one-sided, sneaky and very much not transparent decision on pricing by Zendesk, which I suspect is being driven by chop-licking investors. Who can trust Zendesk now that they have shown how they will treat customers. If we take the offer being dangled, who knows what will happen after their next round of investment.

Unacceptable way to run any business, and a slap in the face. I hope Zendesk will respond in a positive way, instead of burying their collective head under the sand.

Updates

20 May 2010 - no proper response from Zendesk as of this AM. Zendesk users still angrily commenting (of course). 21 May 2010 - an email in from Mikkel Svane, Zendesk CEO, recanted and apologized for the mistake, as well as grandfathering existing customer prices in forever. That was nice of him, and appreciated.

Saturday, May 15, 2010

Voigtländer Color-Skopar 20mm Lens Cap Problem

Voigtländer Color-Skopar 20mm Lens Cap ChallengeThe lens cap that comes supplied with the Voigtländer Color-Skopar 20mm SL II does not fit, when you have the LH-20 lens hood and a filter on. What a dumb design oversight. However, if you get a Nikon LC-52 52mm lens cap, that fits right in there, no problem. Nice.

I like the design of the Nikon caps better than the Cosina Voigtländer or Carl Zeiss ones anyway. Easy to grab and avoid getting my paw prints all over the lens.

I hope this helps any owners of the tiny high-performance Voigtländer Color-Skopar 20mm SL II. Enjoy!

Memo: the real "Rick R. Colgey" is Rick Cogley, Eurobiz

I just noticed that Eurobiz Japan inanely published my article on Interim IT Management Services in their May 2010 issue under the name "Rick R. Colgey". They took the time to painstakingly "correct" my American spelling during proofreading, then got my name wildly incorrect in the article. Thanks a bunch, folks.

So, if you are looking for "Rick R. Colgey" of eSolia and not finding him, that would be me. Please see the contacts below.

Rick Cogley

CEO, eSolia Inc.

http://rick.cogley.info

http://www.esolia.com

Sincerely,

Wednesday, April 14, 2010

Got Mojibake in Mail.app? Here's a Cure.

If you use OS X Mail to send Japanese email, you may find that some recipients complain that your Japanese is "mojibake" or garbled. If you are getting this feedback you can set your default Character Set encoding in the terminal.

How to Set Mail.app's Default Charset

Here's how to change it. Shut down mail, then in Terminal:

$ defaults write com.apple.mail NSPreferredMailCharset "ISO-2022-JP"

That will set Mail's default character set to ISO-2022-JP instead of UTF-8, and after you restart Mail.app, you will be golden. I tested this in Mail.app 4.2 in OS X 10.6.3 and it works for me (at least according to my Outlook-saddled colleagues).

Enjoy!

Tuesday, March 16, 2010

Opening a Tab-Delimited "CSV" in Apple iWork Numbers

I like Numbers, from Apple's competent and beautiful iWork suite, but there are still things where it is different from Microsoft Excel, and hence it feels somewhat unfamiliar at times. For example, although Excel has never been good at handling text files saved in UTF-8 format (a big deal for those of us who work in Asia), it does have a nice Wizard for importing CSV or TSV text files.

Some applications export text files with tab-separated values, and put a CSV extension on them. Actually, CSV stands for "Comma Separated Values" where these are really "TSV" or "Tab Separated Values." When you try to import such a CSV file, Numbers will mash all the fields into one cell in the left-most column. That makes sense, because it's looking for commas judging by the CSV extension. Finding none, it just lets the data pile on.

How to Import a Tab-Separated "CSV" in Numbers

If you have a tab-separated CSV, here's how to open it:

  1. Save the file somewhere you can find it.
  2. Rename the file in Finder, so that it has a .TXT extension.
  3. Ctrl-click the file and choose "Open With" and "Numbers".

Now the data will open correctly, with each field getting its due, and you'll get the added benefit of Numbers not munging any Japanese or Chinese characters.

Hope this tip helps someone. Enjoy!

Tuesday, February 23, 2010

Fixing an Unexpected Prompt Hostname in OS X

In Mac OS X, you may have noticed if you use the Terminal that OS X automatically picks up what it thinks your hostname should be and sets it. This is nice, but the problem with it is if any utility uses your hostname to set config files, you'll have a different config file every time.

How to fix a "Strange Hostname" in an OS X Prompt

If you are getting varied prompts that look like this...:

rcogley@em60-123-194-6 ~>

...where what you're expecting is something like this:

rcogley@rickmac ~>

To fix this, you can use scutil. Here's how I did it:

scutil --set HostName "rickmac.esolia.net"

Substitute the rickmac bit with your own hostname and domain and you'll be good to go with a static prompt. Try these also:

scutil --get HostName

scutil --get LocalHostName

scutil --get ComputerName

man scutil

I hope this helps someone. Enjoy!

Monday, February 15, 2010

Aperture 3 Upgrade Observations

Aperture 3 Confirm Faces InterfaceMy upgrade to Apple's Aperture 3 came over the weekend so I upgraded and started letting it analyze faces using the iPhoto-inspired "Faces and Places" feature.

Here's a few observations from the upgrade process and just a little use of the Faces feature.

  • Aperture 3's icons are colorful, compared to its predecessor. I think they still look professional, but they are a little "friendlier" and more iPhoto-like.
  • Aperture 3 itself is just under 1GB in size but the sample library is about 7GB.
  • To use the new features of Aperture 3, you must upgrade your Aperture 2 library. This can take several hours and did for me on a 50GB library.
  • Backup "Vaults" seem to also require a full refresh, probably due to the library upgrade. Vault backups still run in that irritating modal dialog box that pops up and interrupts. Best to freshen Vaults when you don't have to work on anything else, but I still love the ability to have multiple Vaults. Note, Vaults are freshened in serial - it seems to do one, then do the next.
  • Both TimeMachine and Spotlight indexing get kicked into overdrive because they detect upgraded files from the Aperture 3 upgrade activities.
  • With the new Faces feature, you have to train Aperture 3 to use it. If you pick a folder of photos in your library with people you commonly photograph, and spend the time to tell Aperture who is who, you can then use the "Confirm Faces" feature to drag-select vast swaths of matching faces, or, to toggle a face to be "not Jim" or "not Jane". It works better the more you train it, and it's fun to see who it "thinks" you are. Family resemblances can be telling :-). Faces also links to Address Book entries.
  • Aperture 3 is most definitely snappier compared to its previous version, and registers in Activity Monitor as Intel 64-bit. My library uses about 250MB of memory.

I think it's a worthwhile upgrade just for the speed increase.

Friday, February 12, 2010

Set MBR Correctly to Backup Successfully with OS X Time Machine

OS X Disk Utility Partition MapIf you use Time Machine on OS X, you need to ensure your target drive is formatted with the correct Master Boot Record type. Time Machine requires either "Apple Partition Map" (works with PowerPC or Intel but is best for PowerPC) or "GUID Partition Table" (works with Intel).

There are a couple of problems which lead to this requirement biting people on the you-know-where.

  • Pre-formatted drives that will work with a Mac are not often formatted with "Apple Partition Map", but will be recognized by your Mac, lulling you into a false sense of success and security.
  • Time Machine rudely does not warn you that your drive has a problem. It will happily back up for a while, then fail with some not-so-useful error.
  • Re-formatting a drive in the normal way using "Erase" in Disk Utility will just erase the content and not re-do the partition map.

So, when prepping a drive for Time Machine use, you need to use the "Options" button to set the Partition Map.

Formatting a Drive for Time Machine Use

Here's how to set it up.

  1. In Disk Utility, select your new hard drive (the drive, not the partitions below it in the selection tree).
  2. Select the Parition tab, which you can see in the accompanying graphic, and choose the number of volumes from the "Volume Scheme" pop-up menu.
  3. Click "Options", then choose "GUID Partition Table" for an Intel-based Mac or "Apple Partition Map" for PowerPC- or Intel-based Macs. Then click "OK" and "Apply".

I hope this helps someone avoid the trouble I had getting Time Machine working smoothly. Enjoy!

Friday, February 05, 2010

Fixing Slow Snow Leopard Mail

OS X Snow Leopard Mail SMTPMany upgrading Mac users have reported that Mail is "slow" in Snow Leopard 10.6. There are several things you can do to remedy the situation. Here's what you can try, but please make sure you have Time Machine backing up your system, or are running an alternative like SuperDuper! or CarbonCopyCloner.

Reset SMTP Mail

One thing that sharp users observed on Apple's forums was that newly-created Mail accounts were not experiencing the slowness to send, that upgraders were commonly experiencing. You can export your mail, recreate your accounts and re-import everything, but another way to mimic creating a new account is to re-set SMTP credentials. It's a bit voodoo, but it seems to work.

  • In Mail app open Preferences, choose the Account you are having trouble with, and then choose "Edit SMTP Server List" from the "Outgoing Mail Server (SMTP)" drop down, in the Account Information panel.
  • Select the SMTP server you are using, and re-enter its credentials.
  • Click OK to Save.

Do this for all your SMTP servers, and remember you can always use Keychain Access to confirm saved passwords.

Vacuum That Index

Mail keeps an index of your messages in a sqlite database, and you can "vacuum" that index regularly to compact and clean up. This is especially useful if you regularly delete mail, and is well-documented on various Mac-related web sites. Quit mail, then from Terminal, run these commands.

yourhost:~ youruser$ ls -lah ~/Library/Mail/Envelope\ Index

yourhost:~ youruser$ /usr/bin/sqlite3 ~/Library/Mail/Envelope\ Index vacuum;

yourhost:~ youruser$ ls -lah ~/Library/Mail/Envelope\ Index

The bookend "ls" commands just show how large your Envelope Index is in megabytes, so you can see the before and after, when running the vacuum command. The middle sqlite3 command vacuums the index. For reference, recently vacuuming my mail envelope index required about 10 minutes, but reduced its size from about 70MB to about 40MB.

Run Cocktail

And finally for general performance, you should regularly run Cocktail. From Maintain's site:

Cocktail is an award winning general purpose utility for Mac OS X. It is a smooth and powerful digital toolset with a variety of practical features that simplifies the use of advanced UNIX functions and helps Mac users around the world to get the most out of their computers. Cocktail is installed at more than 200 000 computers world wide. The largest part being private individuals, but Cocktail can also be found at large international companies (Puma, Sony), educational institutions (Harvard University, University of Texas) or newspapers (The New York Times, Business Week).

The application serves up a scrumptious mix of maintenance tools and interface tweaks, all accessible via a comprehensive graphical interface. Most of Cocktail's major features are arranged in five basic categories. In addition, a Pilot lets you clean, repair and optimize your system with one click of the button.

Cocktail's Pilot is where you can schedule commands to run. I do a weekly Cocktail run, to reset disk permissions and delete caches. It seems to keep things running smooth, but you should note that for certain system cache resets, you should restart the system afterwards.

At any rate, I hope the above information helps someone out. Enjoy!

Sunday, January 24, 2010

Fixing Aperture Vault Errors from Terminal

Apple's pro photo management application Aperture 2 is long overdue for an upgrade, and I hope that we'll see Aperture version 3 before long. But while I'm itching for new features and functions, Aperture 2 covers the bases for me, in spades. Aperture has a nice feature called Vaults, which lets you automatically back up your photo library with all metadata to an external drive or drives. Except when it doesn't. For whatever reason, I was having trouble saving to one of my vaults saved on an older external FireWire hard drive, and it was returning errors about not being able to create folders or write files. This sounded like a permissions problem, so I looked into it.

An Aperture vault is a "package" file in OS X, which means the file is a collection of folders and files, which appear in the Finder as a single file. The original Aperture library, the iTunes and iPhoto libraries, and files from applications like Keynote or Pages are like this. Note I'm using OS X Snow Leopard 10.6.2, but these instructions should work on Tiger or Leopard as well. Here's how I dealt with the error.

How to Refresh Permissions on your Aperture Vault

The first thing is to shut down Aperture. Since Aperture grabs the Vault file and holds it open, it might be locked. Looking at the MyVault.apvault file in Finder, I can see it's locked by doing cmd-I and digging around in the information panel.

Recursively unlock. Because you need unlocked files to perform permission settings, you can start by recursively unlocking a folder, like this. Use sudo if you are not logged or su'ed in as root (run "sudo bash" to do this but be careful), and you can unlock files in an entire volume by cd-ing to /Volumes first if need be. Of course you can do this in the Finder's information panel as well.

chflags -R nouchg /path/to/folder/MyVault.apvault

Set POSIX owner and group. Comparing to a working Aperture Vault, the basic permissions were your usual user account, and "staff" as the group. Change the owner to your account with the group as staff. The -R makes it recursive even inside the vault package file.

chown -R rcogley:staff /path/to/folder/MyVault.apvault

Set POSIX basic perms. After setting the owner and group, I set the vault's permissions to 777.

chmod -R 777 /path/to/folder/MyVault.apvault

After that, I re-opened Aperture, refreshed the Vaults, and it worked without a hitch. I hope this hint helps someone. Enjoy!

Monday, January 18, 2010

Rick's Picks (weekly)

  • Apple's iWork '09 Numbers spreadsheet is a versatile app with a lot of power available if you open your mind and don't expect it to be Excel. It does not quite do everything Excel does, but it handles UTF-8 well (where Excel does not and has never), and I take advantage of that often. I also love the formatting options and the multiple-sheets-per-document paradigm, but that is a different post. One challenge in both Excel and Numbers is how to handle fields with numbers with leading zeros. For instance, a part number 001234 will come out as 1234 when you import it from a CSV in either app, and lose meaning if the actual part must include the leading zeros. You can set a cell or column format in Excel as 000000, and this works the same way in Numbers, except the method's a little unfamiliar. How to Format a Part Number Field to Preserve Leading Zeros

    tags: apple, iwork, numbers, zeros, text, format


Posted from Diigo. The rest of my favorite links are here.

Friday, January 15, 2010

Handle Leading Zeros in iWork Numbers

Apple iWork Numbers Leading ZerosApple's iWork '09 Numbers spreadsheet is a versatile app with a lot of power available if you open your mind and don't expect it to be Excel. It does not quite do everything Excel does, but it handles UTF-8 well (where Excel does not and has never), and I take advantage of that often. I also love the formatting options and the multiple-sheets-per-document paradigm, but that is a different post.

One challenge in both Excel and Numbers is how to handle fields with numbers with leading zeros. For instance, a part number 001234 will come out as 1234 when you import it from a CSV in either app, and lose meaning if the actual part must include the leading zeros. You can set a cell or column format in Excel as 000000, and this works the same way in Numbers, except the method's a little unfamiliar.

How to Format a Part Number Field to Preserve Leading Zeros

Here's how to not maim your part numbers.

  1. Select your column to format, and open the Cells inspector.
  2. Select Custom Format from Cell Format then click Show Format.
  3. Give the format a name, and choose the base type.
  4. Delete whatever format is in there by default and drag up an Integers type lozenge.
  5. Open the disclosure triangle, and choose "Show Zeros for Unused Digits" and you will see the #,### change to 0,000. Click Show Separator to deselect it and remove the comma. Add two digits.
  6. Click OK to save and apply the format to the selected column.

If you set the format as 000000 for a field that includes six digit numerics with leading zeros, and a mix of text with numeric part numbers, such as:

001234

P098765

005544

R-09-PCX

... the latter will not be affected by the format, which is just the right behavior we need.

I hope this tip helps someone, because not being able to set this really drove me a bit batty. Enjoy!